Introducing Terrazzo pavers to our product line offering CUSTOM DECOS and sandblasted LOGOS which can be specified for any size project and to accommodate any size budget.
This is NOT “poured in place” Terrazzo…. which is quite common, on elementary and high school floors back in the day and big in institutional construction implementation. Terrazzo materials are available for commercial, institutional, and residential projects.
Finishes, Custom Decos and Logos
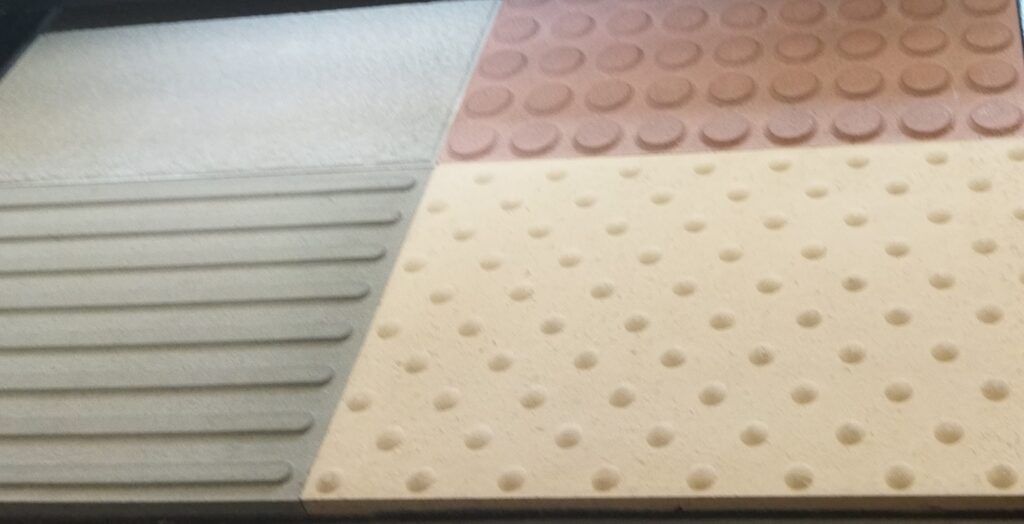
ADA-compliant products are also available in a multitude of colors and formats. Standard surface finishes are polished, sandblasted, and honed. Any design can be submitted. Below are some of our popular “stock” options.
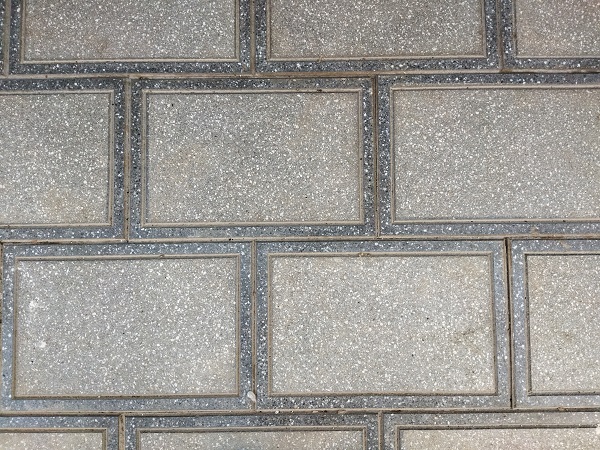
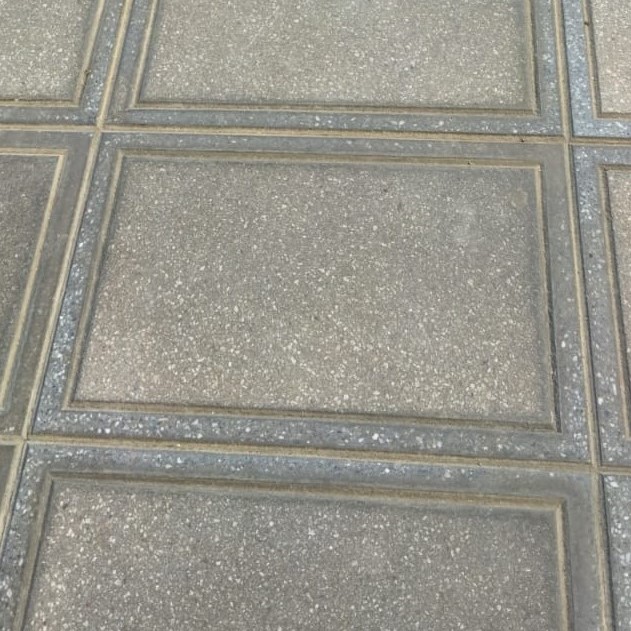
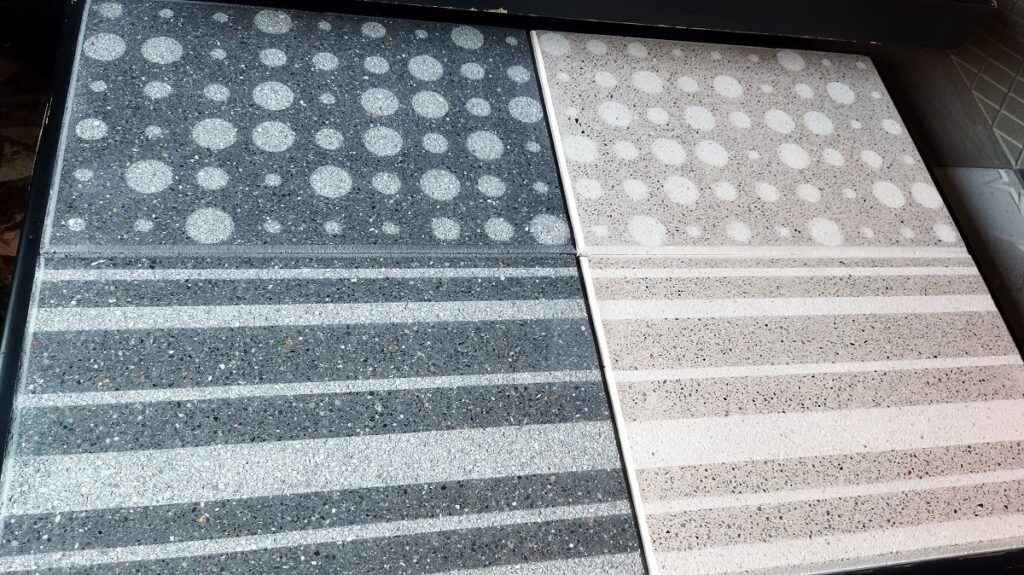
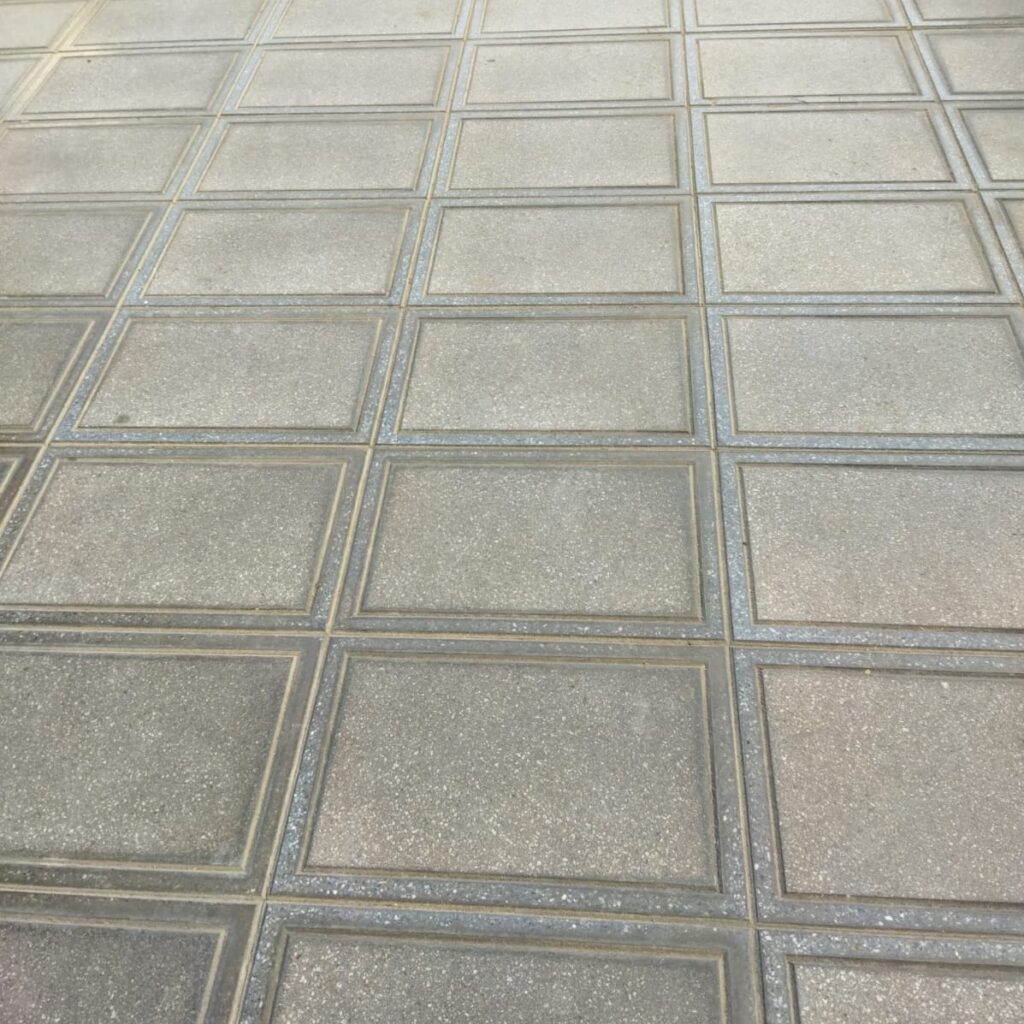
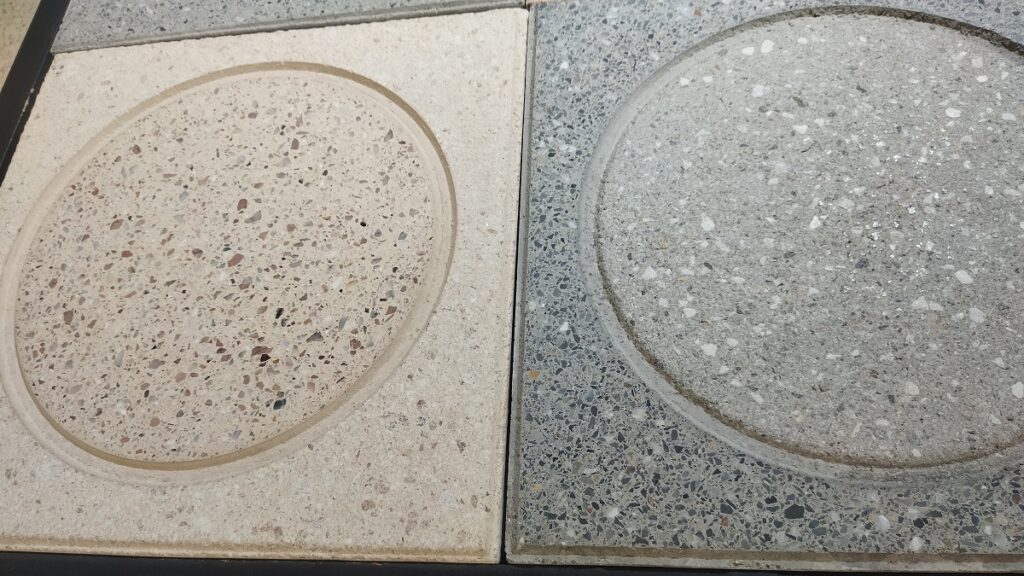
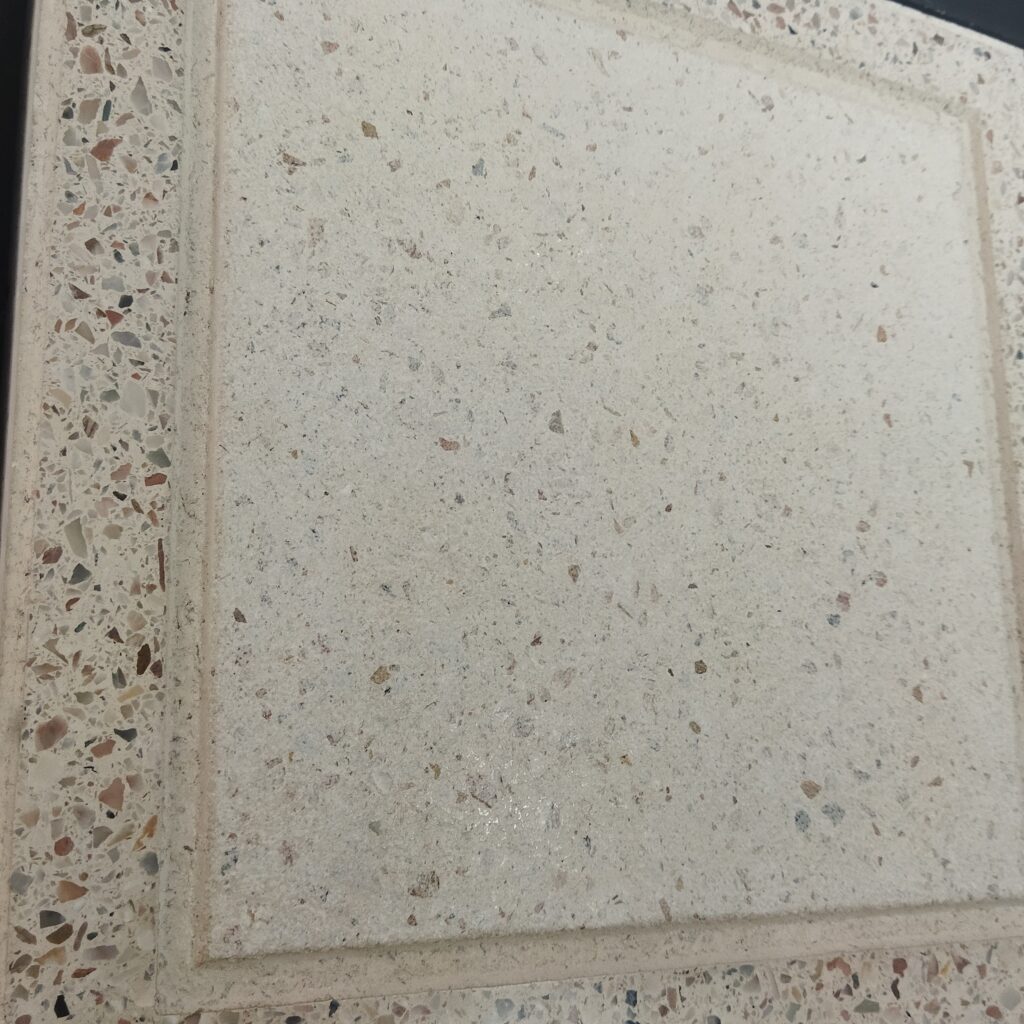
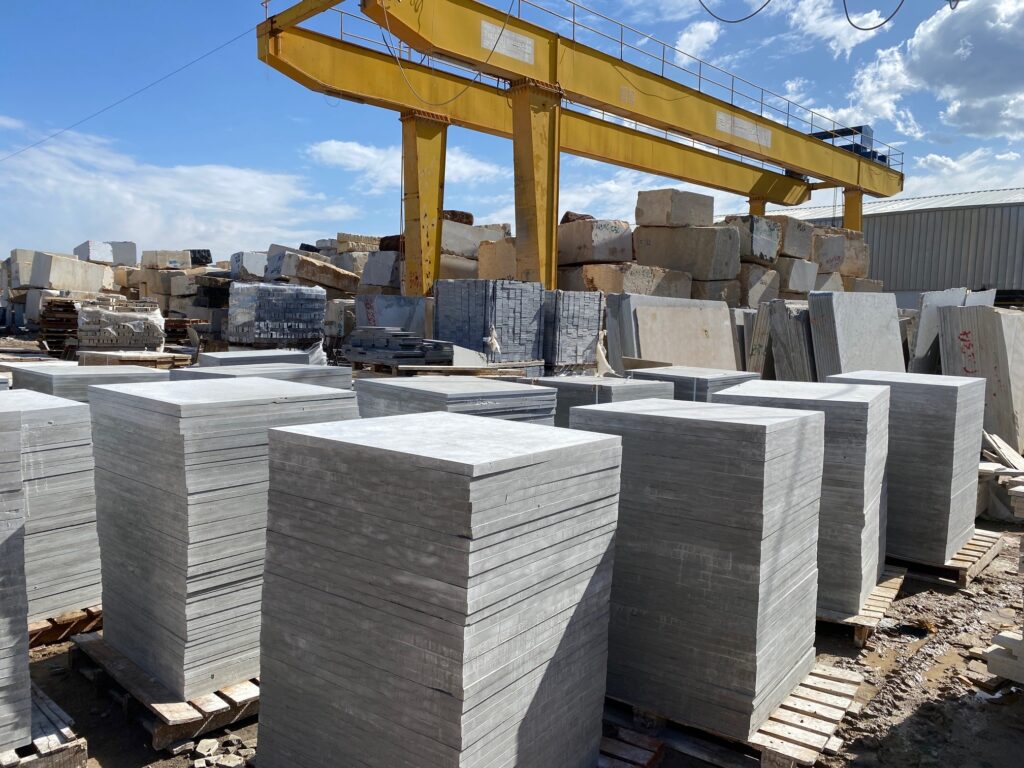
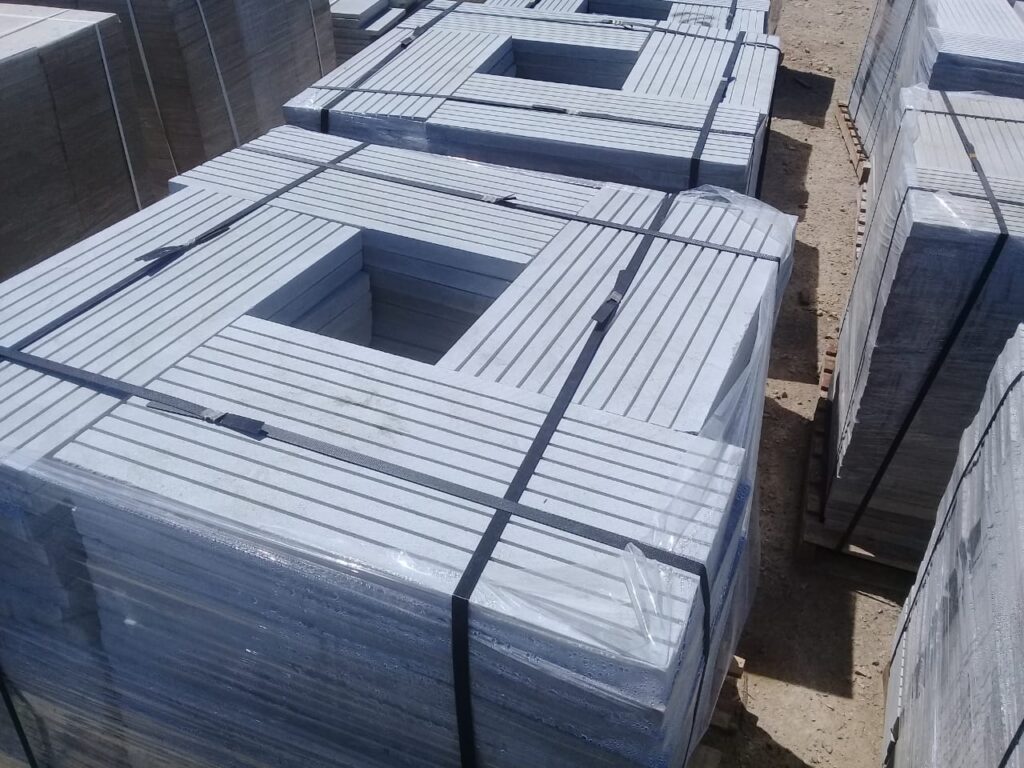
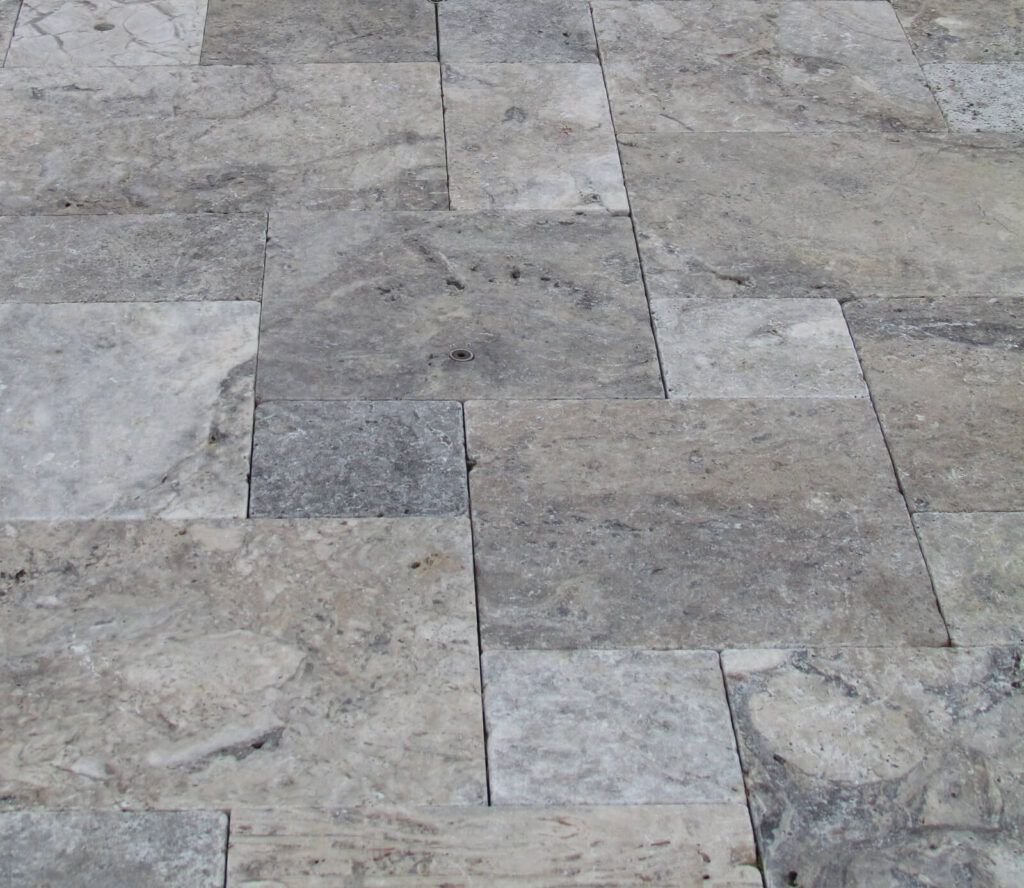
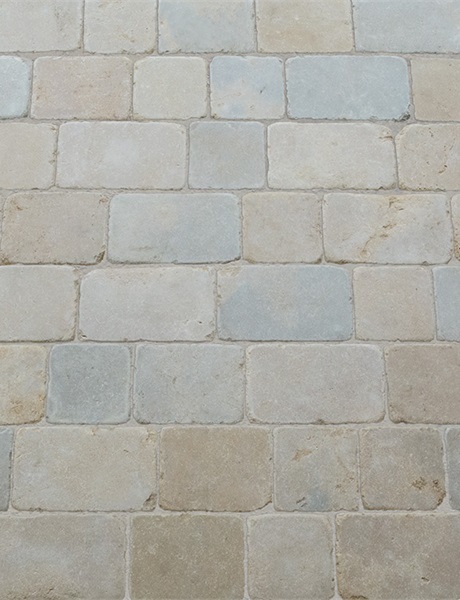
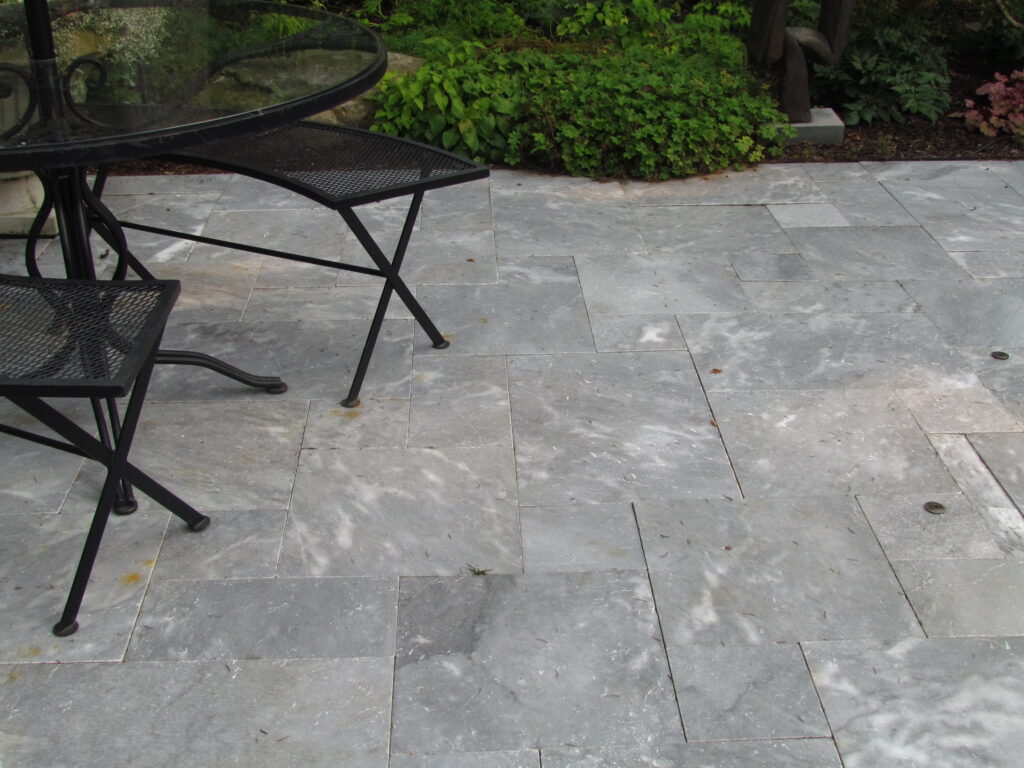
Examples of our Terrazzo Pavers
A LARGE COLOR selection is available other than what is shown below.
Grey rectangles with sandblast center-polished border SEAHAZE SEA Limestone facade, grey Terrazzo paversGrey square pavers polished border, sandblasted centerGrey or beige bubbles-stripesGrey square pavers polished border, sandblasted centerTerrazzo-round-inset-beige-or-greyADA-compliant designs, offerings, and options.Grey 4×4 lookBeige polished and sandblasted center
Gothicstone produces custom stone solutions – the piece parts of the whole project are produced together for a turnkey solution. No more trying to figure out what pool coping, treads, or wall caps will go with your pavers. Consequently, with our distinctive selections of materials, colors, surface finishes, and sizes, we can easily personalize your client’s outdoor living spaces.
We collaborate with our clients from cradle to grave
We collaborate closely with our clients from cradle to grave. In other words, we work with our clients every step of the way to ensure their success and the success of their projects. Therefore, in all projects, we make sure that we understand where the material will be used and how installed so we can make recommendations for size, thickness, and surface finish.
Free value-added consulting services
Many clients have designs or complexities in their projects that require an expert source for the best ways to engineer a solution. Gothicstone provides free value-added consulting services. For instance, we assist in planning, designing, selecting, value-engineering, and installing techniques for natural stone.
Custom stone solutions example
A Tennessee client wanted a particular grey color stone for their lower pool deck, outside entertainment areas, and house-level patios. We consulted with the general contractor, pool builder, and architect to determine the size of the large format stone to produce. Consequently, through reviews of drawings and discussions regarding installation methods, we recommended 30″x30″ pavers. Subsequently, this size paver minimizes the number of cuts and wastes across the 6500-square-foot project.
It was cost-effective for the client for us to produce 3/4″ stone for the upper patio areas (wet-set installation). Similarly, we produced 1 1/4″ paver thickness for the lower pool and entertainment decks that were going to be dry set. With the size of the pavers being 30″x30″, the thinner pavers were going to be a lot easier to install! A bush hammer surface finish was added to the 30″x60″ steppingstones for an optimum non-slip finish. Grate drainage pavers, for water overflow, were added to match the pool deck pavers. The copings are 40″ in length and the outdoor shower slabs were cut to exact custom sizes for easy installation.
Contact us to start the conversation about your next project and how Gothicstone can help you achieve your goals!
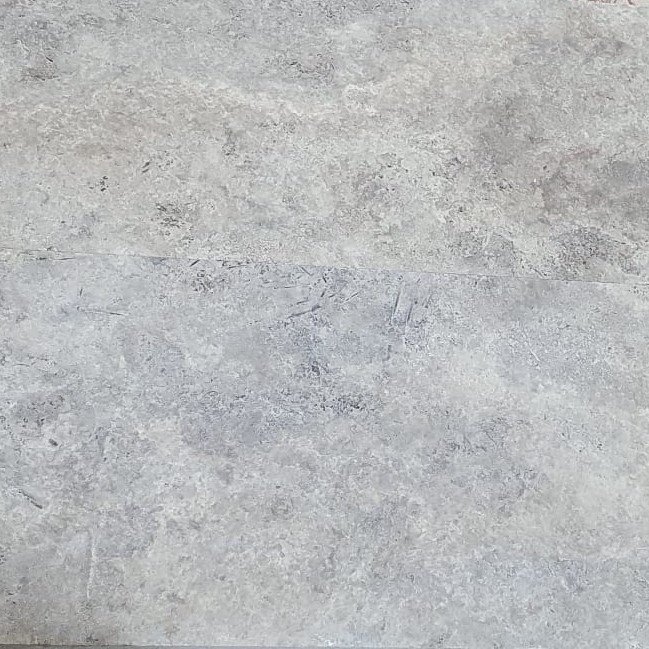
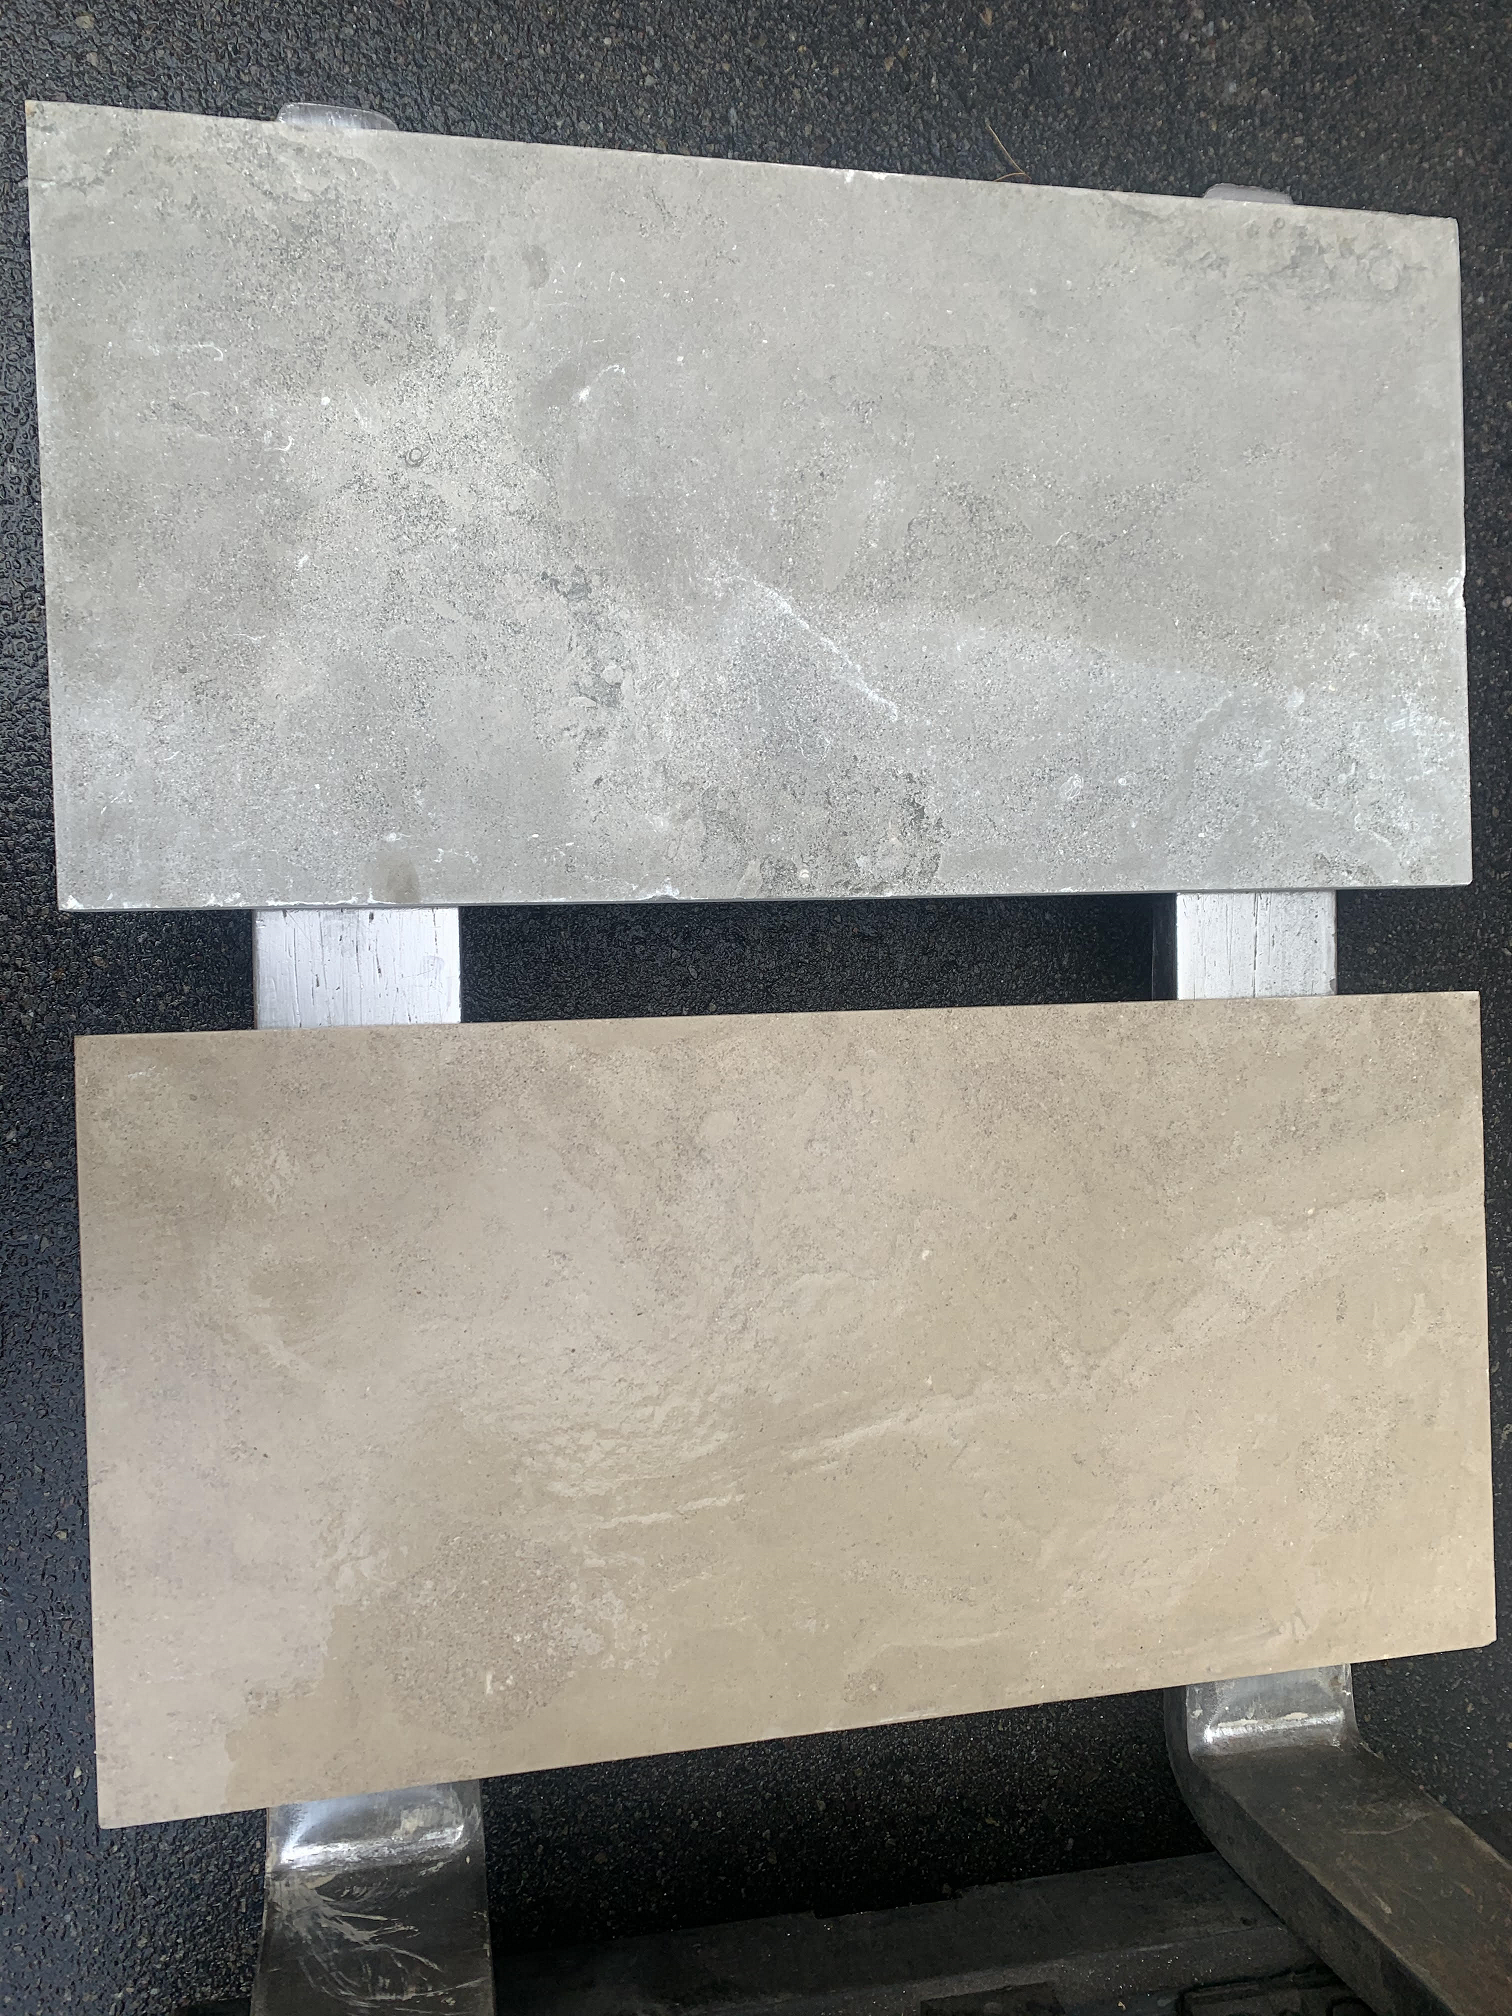
Silver Travertine color selections are typically a mixture of light and dark silver-grey with beige and white colors. Gothicstone is promoting three Silver Travertine selections for better project specificity. The Toadflax selection is the mix of the quarry, as mentioned above, and the Gunmetal selection is all silver and grey with little if any beige or white. The third selection is the Adirondack selection which is a much darker selection of silver and grey. All three selections have lots of movement in the stone – it is primarily the coloration that is the difference.
Silver Travertine color selections make a difference for your project!
Specializing in custom project productions, we think it is critically important to have the best selection of materials, surface finishes, and custom sizes of pavers, treads, copings, wall caps, countertops, and cladding so we can produce exactly what you need for your client’s project.
See our complete product portfolio of materials, colors, surface finishes, and applications.
Radius Coping, Treads, and Wall Caps are not custom for us!
Just send us the drawings! The dimensions range from 6×12 to 24 x 72 (or higher) but we produce according to the project requirements so, about any size is possible and standard in our productions.
Smart Solutions
We specialize in ‘smart solutions’ designing safety (in particular, surface finishes with a high coefficient of friction) into the implementation and end-use of our products. New surface finishes such as Micro Bush Hammer, SUREGRIP MOLESKINtm, Hand-Chiseled, and, Etruscan Texturetm add soft and subtle interest without changing the material itself.
Cleaning and sealing a natural stone (limestone, travertine, or marble) pool deck or patio is less maintenance than its wood counterpart. Stone sealer and cleaner products are very high-tech and require minimal maintenance to keep your natural stone looking like new over the years.
Cleaning natural stone on a regular basis:
Use any non-caustic degreasing agent (mild dish or hand soap) mixed in warm water. Agitate/scrub with a broom.
Power washing with residential strength power washers (i.e. 3000 PSI or less) is recommended.
Minor restoration cleaning (mild surface etch):
This treatment will renew the original look of the stone surface and make the color ‘pop’ and is only recommended occasionally (maybe once every several years). Not in lieu of regular cleaning.
Dilute muriatic acid 10 parts water to 1 part store-bought muriatic acid.
Hose down the entire stone surface.
Pour diluted mix and move it around with a broom or rag mop – consider doing it in 10-15 square foot overlapping sections. Don’t let it sit in one place without moving and agitating it. The acid will neutralize after 10-15 seconds. Be sure to follow all safety procedures (eye protection, rubber gloves, etc.) as with any caustic material. However, this weak solution of diluted muriatic acid will not attack the skin under normal circumstances. Additionally, after 10-15 seconds of contact with the stone, the acid will be neutralized (100%, more or less) and not harmful to plants, shrubbery, pets, etc.
Finish by rinsing the surface with clean water.
Sealing natural stone when dry-set installation:
For a dry-set installation, it is not necessary to seal the stone. However, sealing the stone with a high-quality penetrating sealer does provide some attractive benefits.
If you choose to seal the stone (to prevent staining that can naturally occur with any masonry product) we recommend ICP brand products, ‘Stain Proof’ sealer, and cleaner products. Please be sure to follow all recommendations stipulated on this page for optimal results: https://www.drytreat.com/sealers/residential/stain-proof.html.
Another benefit is the additional ‘locking in’ effect that the sealer has on prolonging the natural coloration of the stone. Over many years, the stone can fade slightly due to acid rain and other environmental factors.
NOTE: Do not use concrete paver sealers – they are formulated as topical sealers. They can be very slippery and appear as an undesirable shiny coating on the surface. Furthermore, the topical coating traps moisture. It doesn’t allow the stone to “breathe” (which is important for all natural stone products).
NOTE 2: If you choose to purchase sealers from a “big box” retailer, be aware that (even within the same brand name) you will get a lesser quality product. The “big box” retailers force the manufacturers to make less expensive (lower quality) versions for them under the same brand labels.
Sealing natural stone when wet-set installation:
It is best to seal the stone BEFORE grouting as the sealer also acts as a “grout release” and will make the grouting process faster and easier.
NOTE: you mustn’t use concrete paver sealers! They are formulated as topical sealers. It can be very slippery and appear as an undesirable shiny coating on the surface. Furthermore, the topical coating traps moisture. It doesn’t allow the stone to “breathe” (which is important for all natural stone products).
NOTE 2: If you choose to purchase sealers from a “big box” retailer, please be aware that (even within the same brand name) you will get a lesser quality product, as the “big box” retailers force the manufacturers to make less expensive (lower quality) versions for them under the same brand labels.
With a history in building and value engineering, we can facilitate the requirement for copious quantities of outdoor pavers in home remodeling and commercial projects. We have been a supplier for hundreds of projects over the past 25 years. We offer expertise in selecting and applying natural stone tiles and pavers.
A Source for Outdoor Pavers, Countertops, and Tiles
Our staff is available to discuss custom projects of any size. Our technical staff can answer questions about order amounts, value engineer considerations, and suggested installation considerations. We recommend grout, sealant, and preparation of surfaces, as well.
Choose limestone, marble, or travertine outdoor pavers to complement other building materials, home decor, and the surrounding environment. Discuss your other construction applications such as driveways, outdoor kitchens, and retaining walls for optimum design and value engineering.
Natural Stone is a top choice
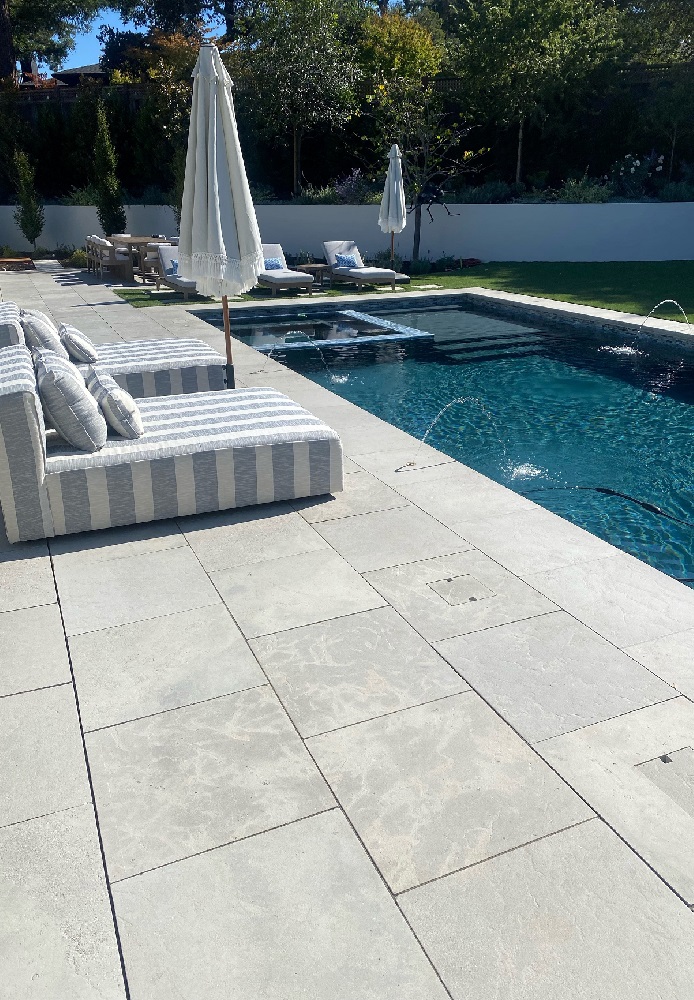
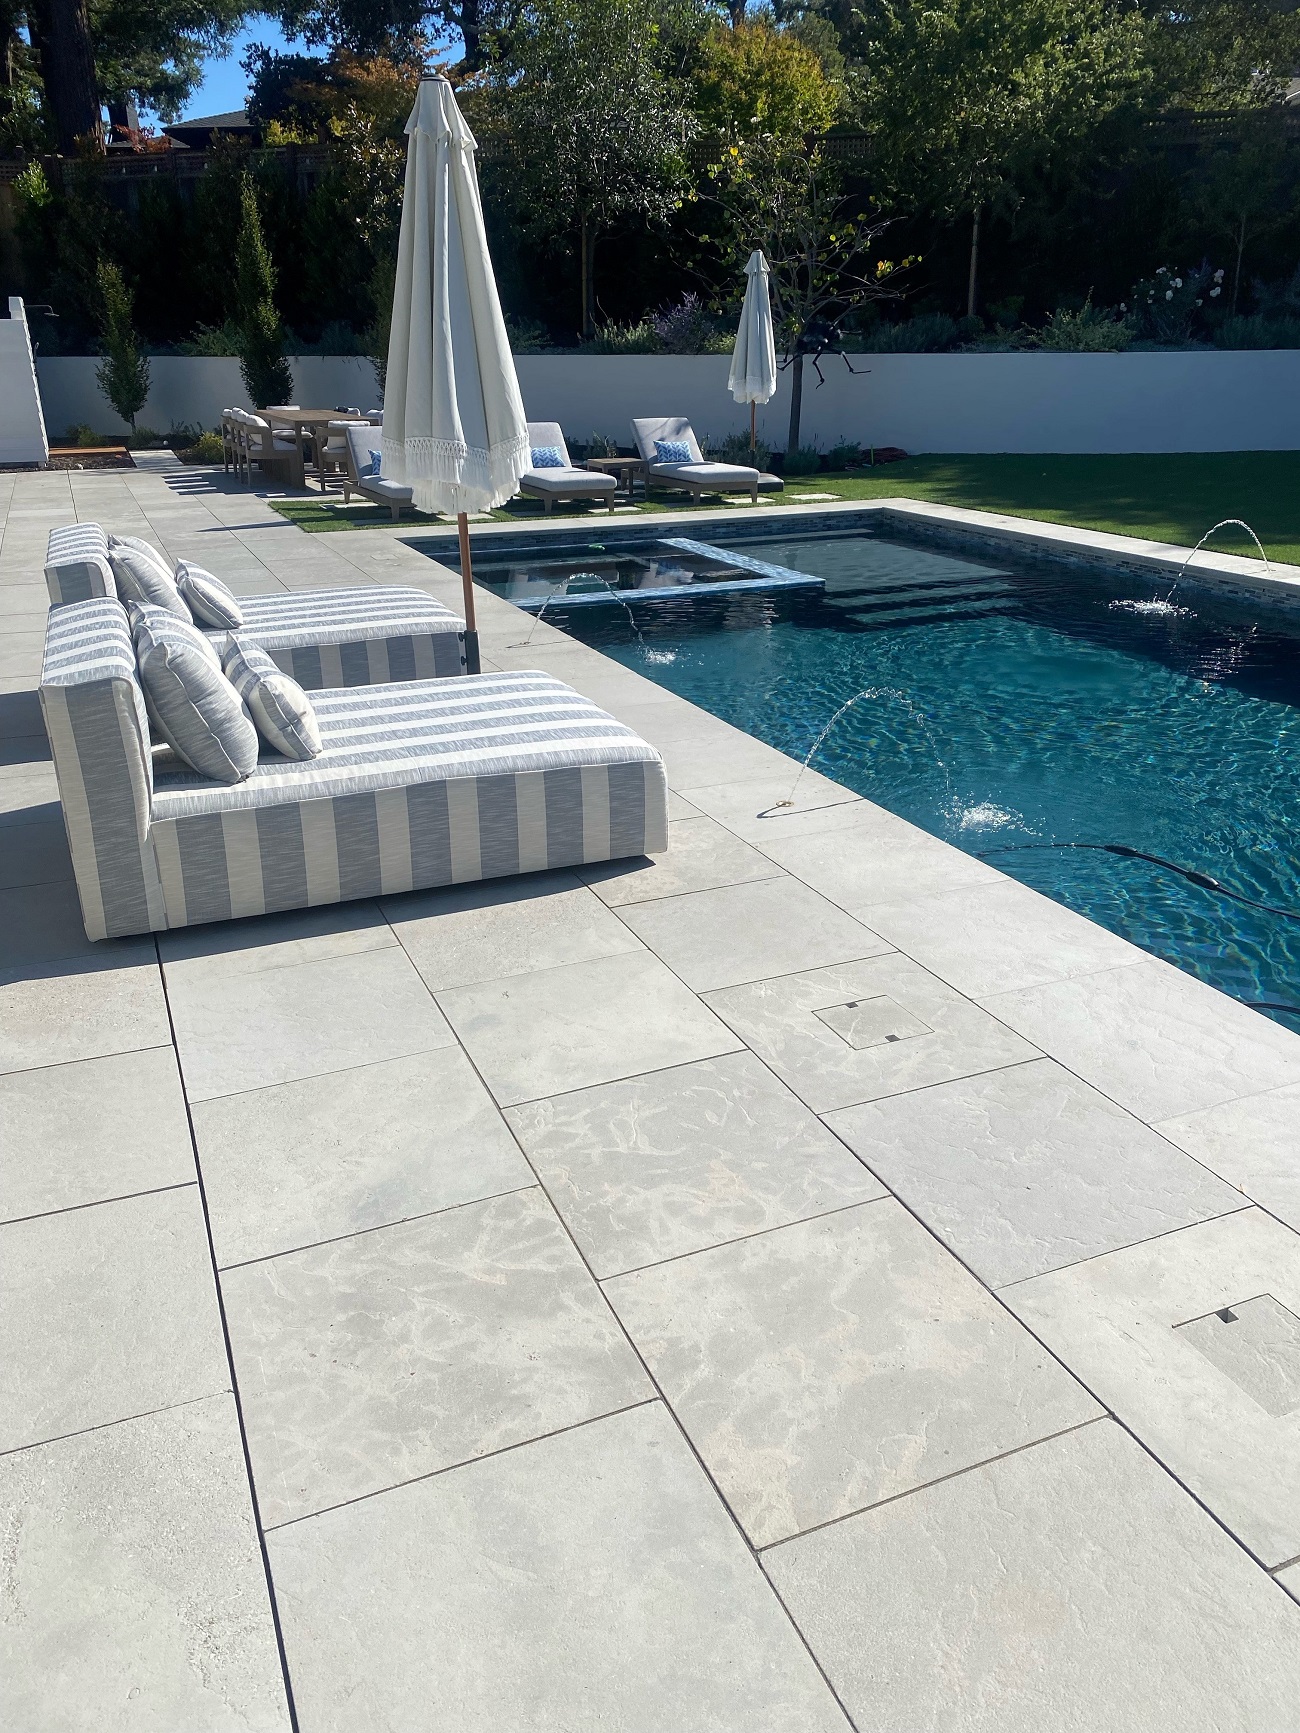
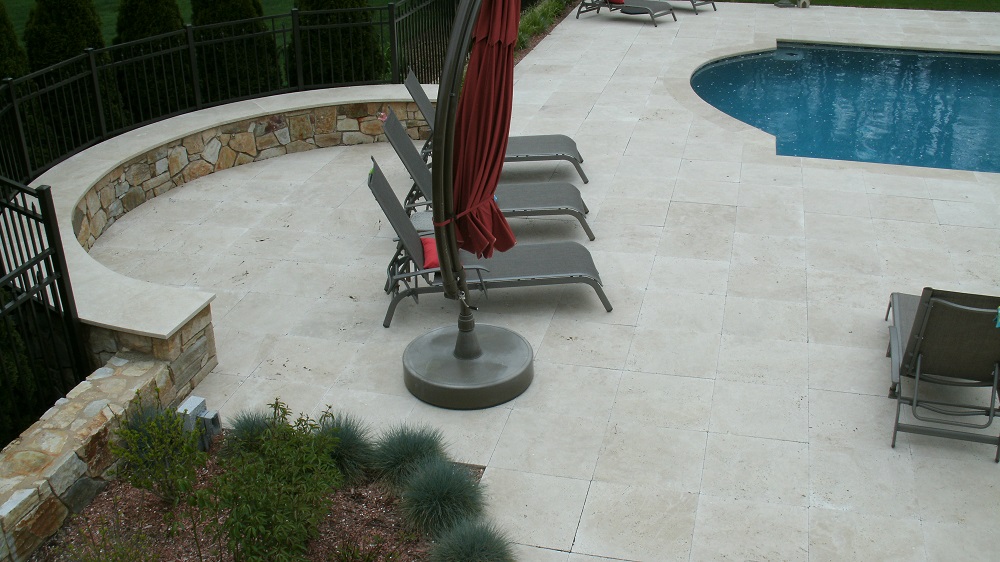
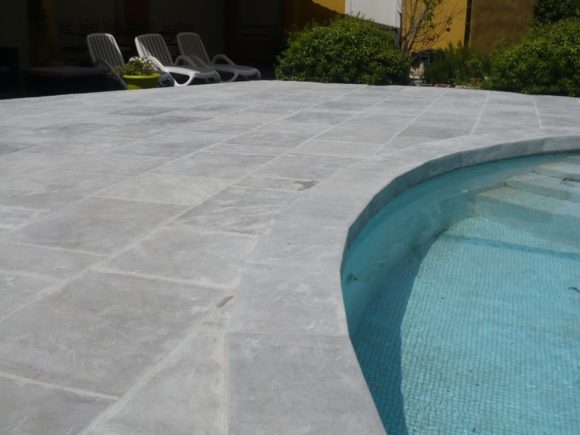
Natural stone outdoor pavers are becoming a top choice in pool deck flooring due to their quality look and easy care. Limestone, marble, or travertine pavers give any pool area an upscale appearance that will last for decades. Consider matching pool coping, wall caps, and stair treads for visual continuity. Twelve different surface finishes are available in our product portfolio to enhance the textural or aesthetics of the project.
Likewise, kitchen remodels are a primary design consideration for both indoor and outdoor cooking and entertainment. Each area can incorporate floor tile or pavers, countertops, and a fireplace facing with the same material. Limestone and travertine are tested for up to zero degrees Fahrenheit. No chipping or cracking when used outdoors.
Gothicstone produces natural stone to your specifications for optimum design and value engineering. We offer more than 300 choices of building products to satisfy important components of your project. Check out some of our projects for ideas.
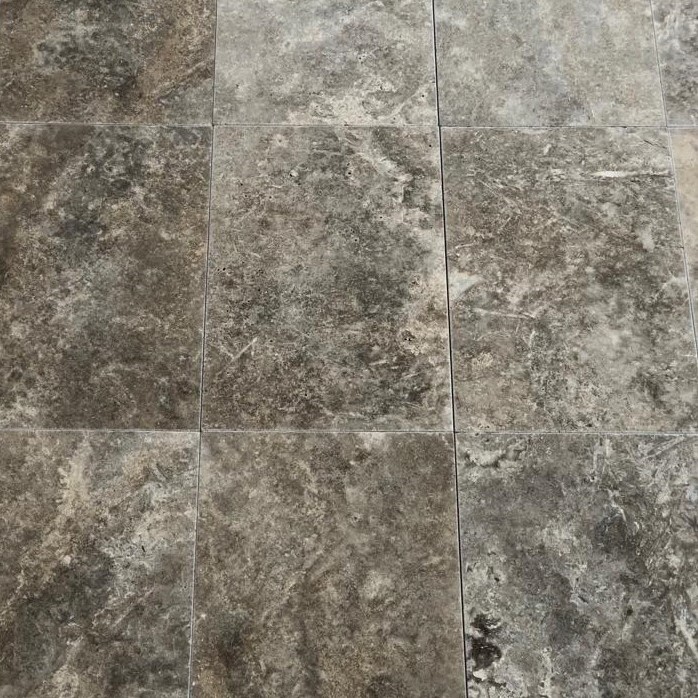
Our most popular materials and colors are shown below for interior or exterior use.
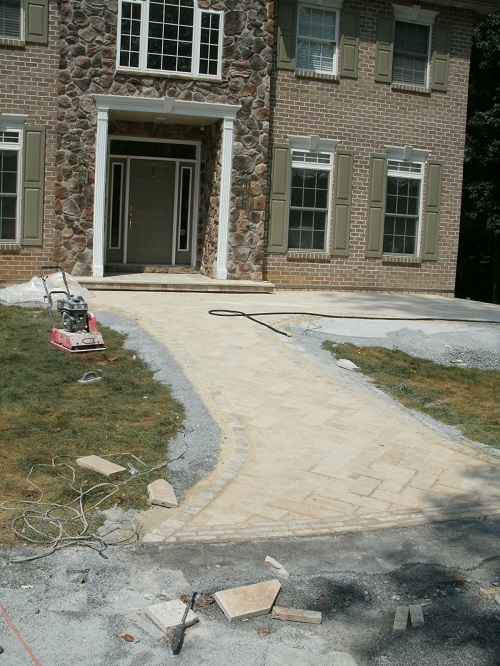
Natural stone paver driveways are a thing of beauty, a real estate highlight, and a feat of engineering. They increase property values, up the curb appeal, and boost resale prices. So, what’s the best way to protect that investment and maintain its physical appeal? Let’s start at the basics, which means ensuring the natural stone driveway installation is done correctly.
There are two options for natural stone paver driveway installation.
‘Dry set’
‘Wet set’
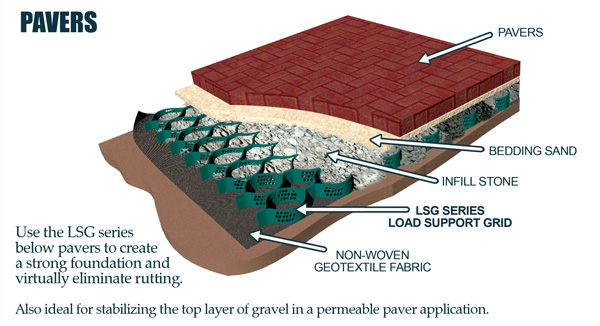
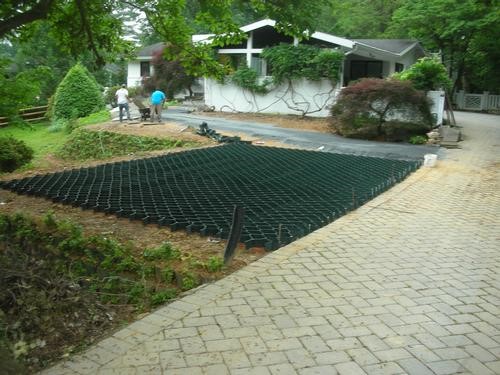
And, at Gothicstone, we suggest all ‘dry set’ and ‘wet set’ installations include a cellular confinement system (CCS) underneath for maximum longevity and lifetime value.
Insider notes: ‘wet set’ driveway installation with natural stone pavers
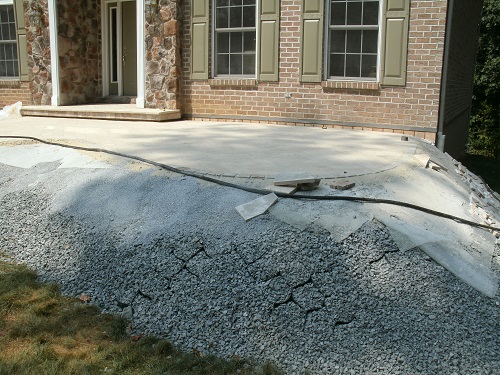
An issue with ‘wet set’ (poured concrete slab substrate) particularly in climates that have a lot of freeze-thaw cycling, is that concrete slabs are used as the sub-base/substrate and often will crack. It’s often not a question of “if” the underlying concrete slab will crack, it’s “when” it will crack. And a cracked concrete slab will commonly transfer the crack(s) to the adhered surface stone or any material on top, such as concrete pavers, for that matter. The reality is very few contractors are willing to put the effort into making a slab that won’t crack because it takes extra work and expense. Utilizing rebar, a geo cellular confinement system, and a ‘separation membrane’ (such as Schluter®-DITRA & DITRA-XL) will mitigate the possibility of failure, as described below.
Geo Cellular Confinement System (CCS) to the rescue: Why implement in a ‘wet set’ driveway application?
Some people think the cellular confinement system isn’t needed under a large concrete slab. But we disagree. The fact is the minimal extra expense will all but guarantee that you will never have slab cracking. Water is going to get underneath the concrete slab and during freezing, it will expand. The cellular confinement system holds everything in place minimizing movement resulting from freezing and thawing environments.
Cell-Tek Geo Cellular Confinement System (CCS)Rutgard Roadway 4 Geo Cellular Confinement System
Steps to installing a ‘wet set’ long-lasting driveway with a cellular confinement system:
To recap, if you want your installation to last a long time, follow these 9 steps:
Excavation with appropriate drainage considerations to mitigate water pooling underneath.
Installation of geotextile to prevent gravel from sinking into the soil below it.
Installation of the cellular confinement system following manufacturer’s best practices.
Fill the confinement system utilizing only clean (washed and graded) gravel. We strongly advise against using ‘modified/unwashed’ gravel mix.
Installation of a top layer of geotextile on top of the gravel.
Installation of rebar grid on the top of the gravel (preferably epoxy coated or ‘high-tech steel alternative’ composite rebar to avoid the risk of rust-causing future failure).
Pour a fiber-reinforced concrete slab. It is imperative to follow the local code regarding the implementation of expansion joints.
To ensure longevity, an extra step we recommend is to install a separation membrane such as Schluter®-DITRA & DITRA-XL on top of the concrete slab to mitigate cracks transferring through to the surface stone.
Professionally install the appropriate natural stone including grout lines (and expansion joints where necessary) to enable expansion and contraction. This is imperative in extreme weather conditions. In a perfect world, ½” thin natural stone can be used when all the above steps are adhered to with precision. Otherwise, we would recommend the 1 ¼” standard thickness for exterior applications.
In conclusion, there are redundancies in the above best practices instructions. There is almost zero chance of failure if all these steps are completed, and the resulting driveway should last a lifetime.
Insider notes: ‘dry set’ driveway installation with natural stone pavers
‘Dry set’ installation is the ideal method for driveway stone pavers. It avoids excessive movement of the stone due to heaving in colder climates. Also, stress from an expansion of the stone in hot climates. These unwanted issues are inherent in poured concrete slab systems. ‘Dry set’ installation is an environmentally sustainable alternative that allows water to pass through it rather than create problematic water runoff.
For the safest approach, it’s best to select natural stone pavers of smaller sizes. When working with smaller pieces, such as 4”x4”, 4”x6”, or even 6”x6” cobblestones, use a ‘dry set’ application. But if your customer wants something different than the classic cobblestone 4”x4” granite, limestone, or porphyry block, the key is to consider the flexural stress on the stone. If the stone surface is longer than 6 inches in any one direction, then a strong (high ‘flexural strength’) material is optimal, particularly when considering a ‘dry set’ application. Avoid natural stones prone to having natural fissures or clefting.
Large format natural stone pavers in a driveway installation
Large format pavers can be successfully installed if the installation is done properly. You can install 12”x12”x1¼”, 16”x16”x1¼”, 8”x16”x1¼” or larger if it is installed correctly. But that’s a BIG “if”. Many contractors/masons rely too heavily on laborers to do the installations, emphasizing speed over quality. This isn’t a good idea. A small void or a “pea under the mattress” can cause failure.
Geo Cellular Confinement System (CCS) to the rescue
To mitigate shifting and cracking, install a cellular confinement system. Gothicstone recommends a cellular confinement system (CCS) under any base. With driveways, it’s almost imperative due to tire track “rutting” to use a CCS. For example, if you have a sand or dirt driveway, ruts inevitably occur over time. But it also happens with blacktop driveways or any driveway where you have constant stress and load on two narrow tire tracks. The vehicle load will compress the ‘track’ area, whereas a CCS can keep the substrate from spreading out. This method prevents stress on the tracks from making ruts in your installation, and thus pieces from failing. Because when the ruts happen, there’s uneven compression on the pieces. It’s the unevenness of the load where problems like this occur.
Small 4”x4”x4” cubes/pavers typically won’t break, which is why people typically use this size of material, but they will be susceptible to rutting and shifting. Often people want to use a larger format driveway stone. If so, a ‘dry set’ and a cellular confinement system are the approaches to use.
Ruts and cracks can be avoided
The larger pieces will help in that they won’t rut as readily, however, they may crack. Whereas small driveway stone pieces will allow the material to “sink down” into the ruts without breaking. But they’ll allow the ruts to occur more easily. Plus, more water is washing in between the joint areas because you have more joint areas.
If you have a 4”x4” compared to a 16”x16”, you’re going to have about 1000% more joint area with a 4”x4” installation. That’s an incredibly exponential amount of joint area because in a 16”x16” area, you will have 16 pieces of 4”x4” material (4 in one direction and 4 in the other direction) and then all those joint lines in between where the water will be entering and then allowing for either washout or heaving underneath it.
So, the smaller driveway stone pavers do allow for more movement to happen but, eventually, they may cause ruts unless you use a cellular confinement system to keep everything underneath in place.
Keep in mind that vehicular weight will be on the pathway of the vehicle tires; that is where the bulk of the load or stress will go.
Steps to installing a ‘dry set’ long-lasting driveway with a cellular confinement system:
To recap, if you want your installation to last a long time, follow these 8 steps:
Installation of geotextile to prevent gravel from sinking into the soil below it.
Installation of the cellular confinement system following manufacturer’s best practices.
Fill the confinement system utilizing only clean (washed and graded) gravel. We strongly advise against using ‘modified/unwashed’ gravel mix.
Follow local code requirements regarding the height/quantity of crushed stone/gravel required in your geographic area.
It’s considered best practice to compact every two inches of height when applying the gravel.
Installation of a top layer of geotextile on top of the gravel.
Installation and compaction of screenings/’fines’ (concrete dust, sand, or small/fine gravel)
Professionally install and compact the appropriate natural stone pavers. Where small grout lines are open between the pavers, sand or polymeric sand can be swept between the joints.
To retain the beauty of the stone, you should use an impregnating stone sealer using a color enhancing impregnating stone sealer, so it keeps the stone looking new. If you want the stone to age naturally, you don’t have to use any stone sealer at all. In any case, sealing in a ‘dry set’ application is not necessary. Never use a ‘topical’ stone sealer (non-impregnating).
5 design approaches using natural stone pavers:
Creating a “deco” look. Use smaller pieces that can manage the load in the heavy traffic areas and install the larger stone along the sides.
Placing smaller format material at apron entrances of driveways. The entrance apron, where vehicles turn in off the main road, typically takes an enormous impact as they swing into the driveway. In most of the United States, when you approach a driveway, there will be a bit of a bump or a swale causing impact. So, on the apron entrance, from the road to the driveway, consider using a smaller format stone. The smaller format driveway stone mitigates the impact of flexural stress, while at the same time smoothing the sloping transition to the street.
Mixing and matching alternating sizes to provide attractive applications. Smaller driveway stone pieces on the apron can be cut from the same blocks of stone as the rest of the project applications. Whether it’s a long driveway, walkway, or pathway leading up to a patio or pool, for example, the entire project stone can match no matter the size or thickness of the material.
Picking the appropriate material if you select larger format driveway stone pieces. Gothicstone™ SEAHAZEtm limestone is extremely strong, has high compressive strength, and high flexural strength.
Choosing 4”x4”x4” cubes is not necessary. It’s not necessary to go that thick, however, with carbon footprint, shipping costs, and other green initiatives being an increasingly important consideration, a 4”-thick paver is going to double the shipping cost of a 2”- thick paver. From both a cost-effective value engineering perspective and a carbon footprint perspective, a 2”-thick piece gives you a better value and is good for the earth!
Have questions on cellular confinement systems and selecting/specifying natural stone for driveway systems? Contact us.
Other resources that may be helpful in planning your driveway installation:
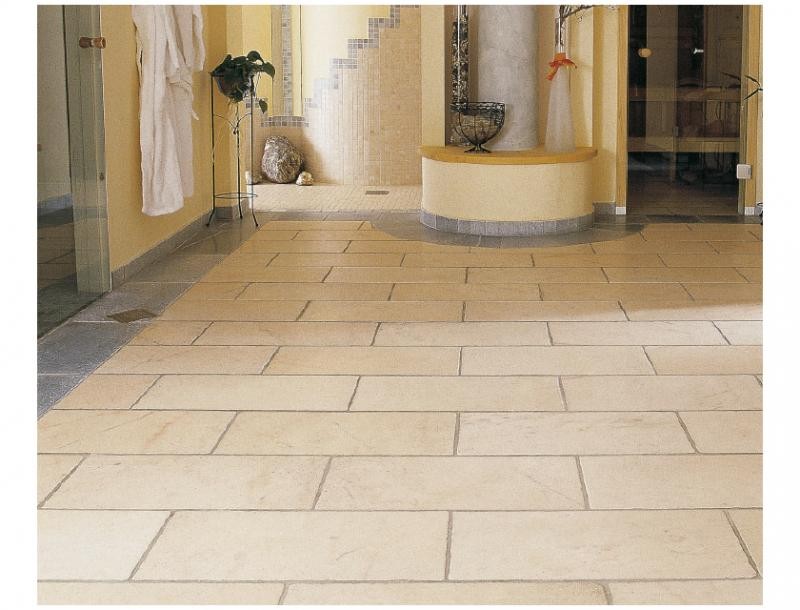
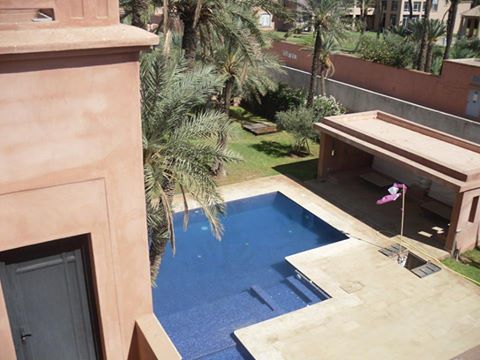
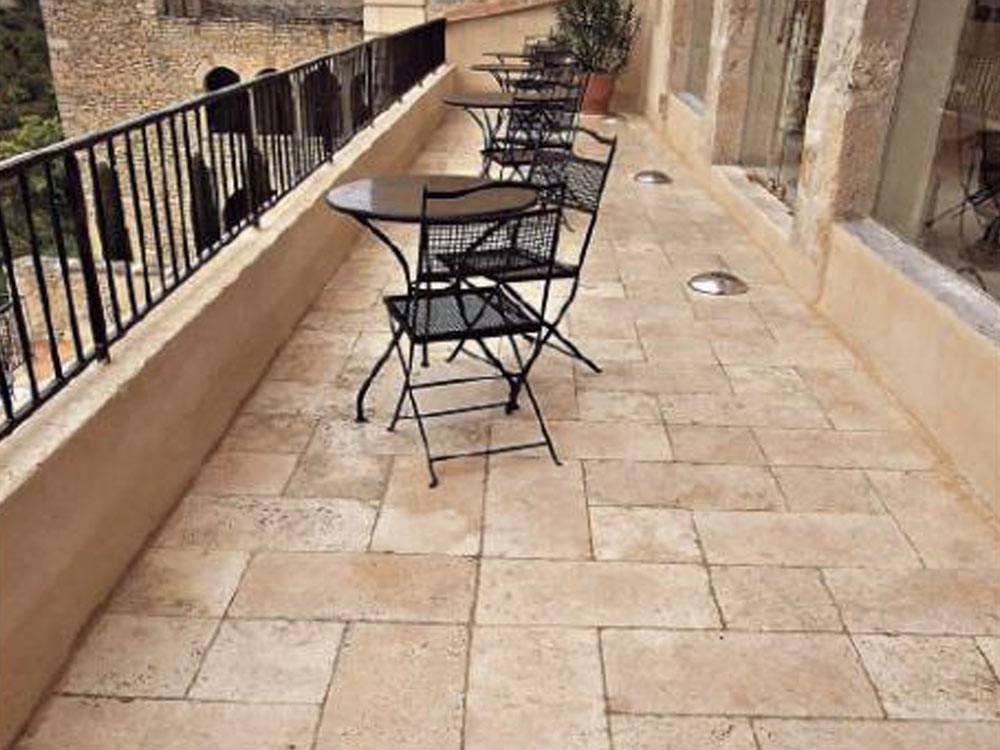
In today’s landscape and interior design concepts, natural stone can be used to create an antique, traditional or old-world look. It’s, also, an excellent choice for contemporary/modern or a mid-century look. Think patios, swimming pool decks, terraces, pool houses, and any interior living spaces. Explore natural stone design ideas for tile, pavers, veneer & cladding, and living spaces for your projects. Unlike concrete or porcelain, design flexibility is effortless because every stone piece part can be fabricated easily.
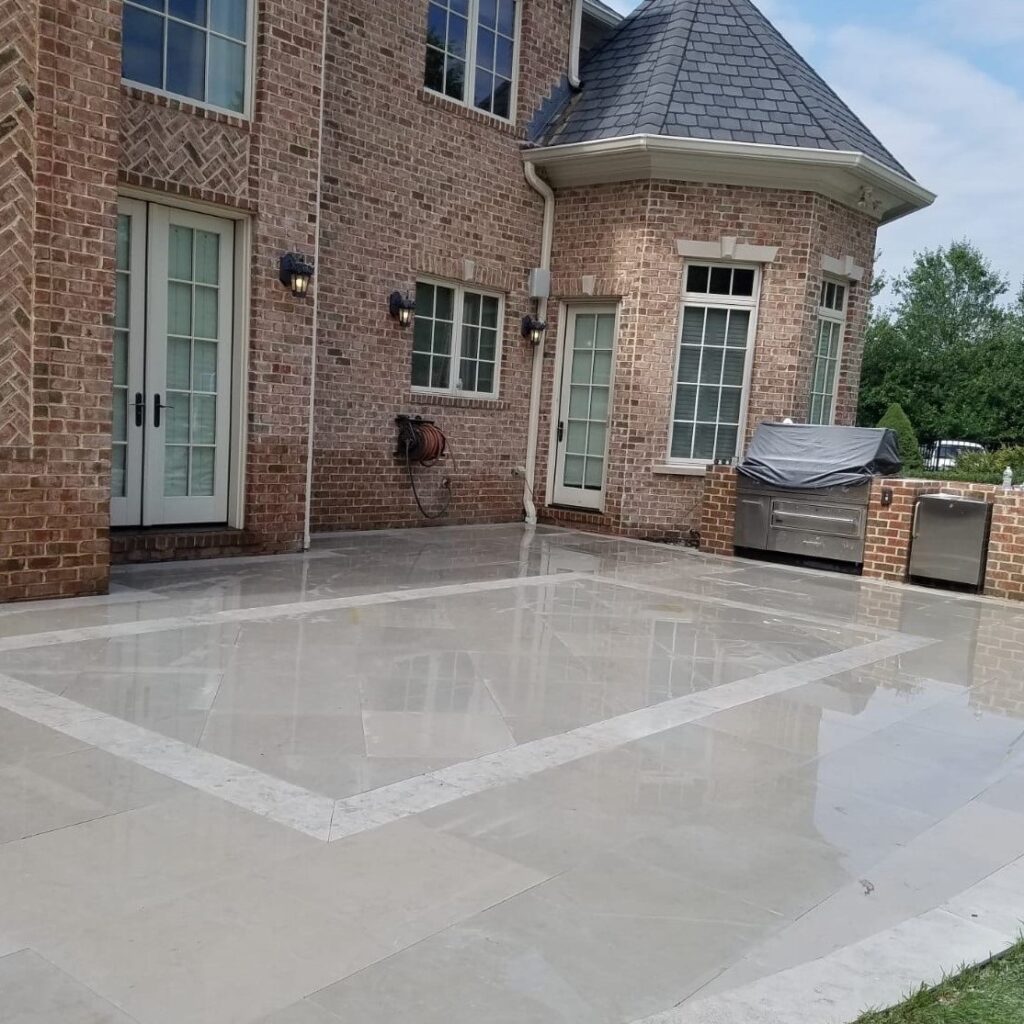
Extra-Large Formats, Fresh Colors, Exciting New Finishes
Design for any space with extra-large pavers and tile sizes from 24″x24″, 18”x36” and up to 48″x48″ plus custom sizes in rectangles and squares. For a seamless, large format design, tile or pavers can be “butt installed”. We produce step treads, countertops, wall caps, and wall systems plus driveway cobblestones and driveway paver systems to complement the project.
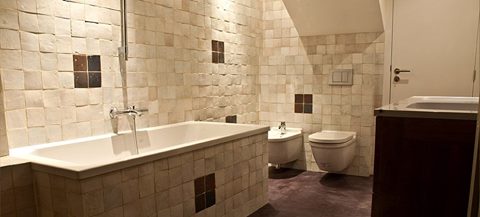
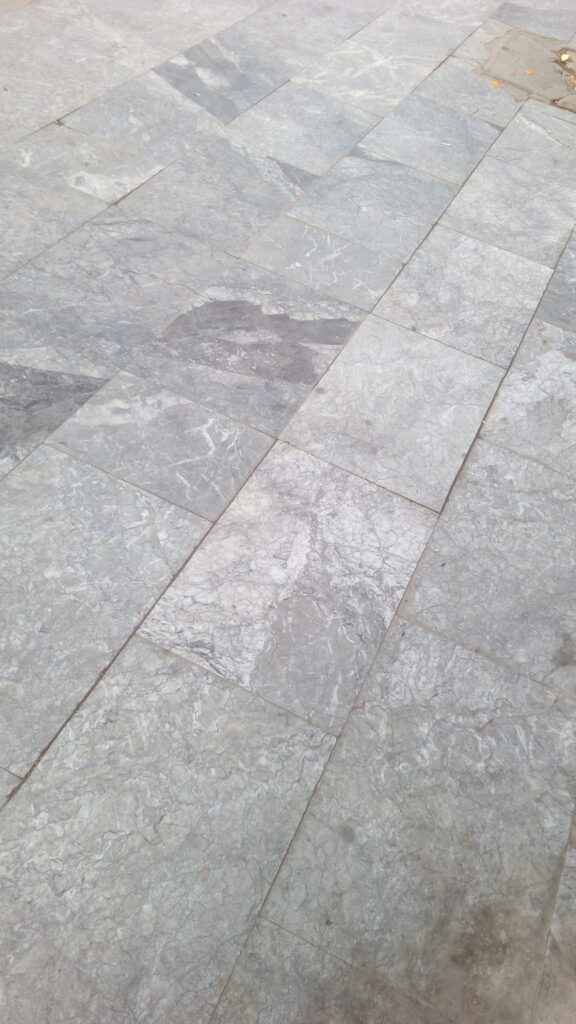
SEAHAZE SEA 24″x48″ Limestone TileCream Travertine Tile, Mosaics, and VeneerPool Deck Pavers & Coping SEAHAZE SEA Limestone Caramel Travertine Radius Wall Caps and Pool Coping, Step Treads, and PaversBathroom SEAHAZE SAND & SEAHAZE SEA Tile, Mosaics
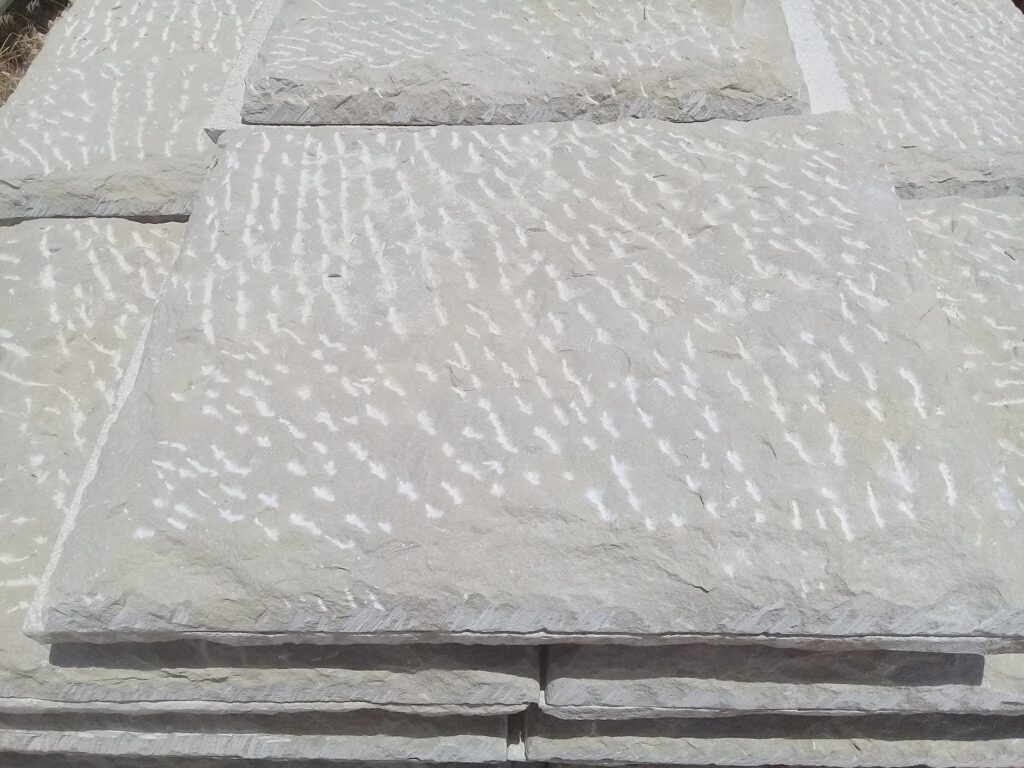
With different (and new) texture finishes, you can create diverse looks from an old-world to modern/contemporary look. Our collections include honed, brushed, Suregrip Moleskin, Etruscan, bush hammer, and micro bush hammer. Other exciting finishes—saw cut, split face finishes and even a hand-chiseled, antiqued finish for that “old-world motif” impact—are available.
SEAHAZE SAND 6″x6″ tile hand-chiseled, antiqued finish for an old-world motif
SEAHAZE SEA 24″x48″ honed tile provides a modern/contemporary look. It’s a great choice for extremely durable flooring in residential and commercial applications.
SEAHAZE SEA 24″x48″ honed tile provides a modern/contemporary look (butt installed) and is extremely durable flooring.
Gothicstone produces in various thicknesses and sizes for interior or exterior considerations such as tile, pavers, coping, treads, wall cladding/veneer, driveway/car park systems, and pedestrian walkways. Architectural accent pieces can be custom-fabricated such as fountains, park benches, and outdoor kitchens/bars.
Add Texture vs. Changing Stone Color
We’re seeing textures shift from rustic tumbled, rounded edges to clean lines, square edges on tiles, pavers, and coping. Tone-on-tone texturing can beautifully enhance the aesthetic of your flooring design. Adding an intriguing trim or pattern through the addition of various surface finishes can achieve the added interest desired. New finishes, such as micro bush hammer, Suregrip Moleskin, and Etruscan Texture, add subtle interest without changing the material.
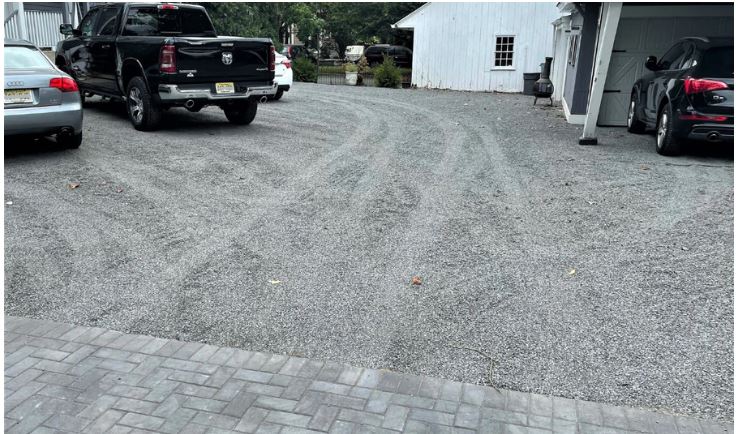
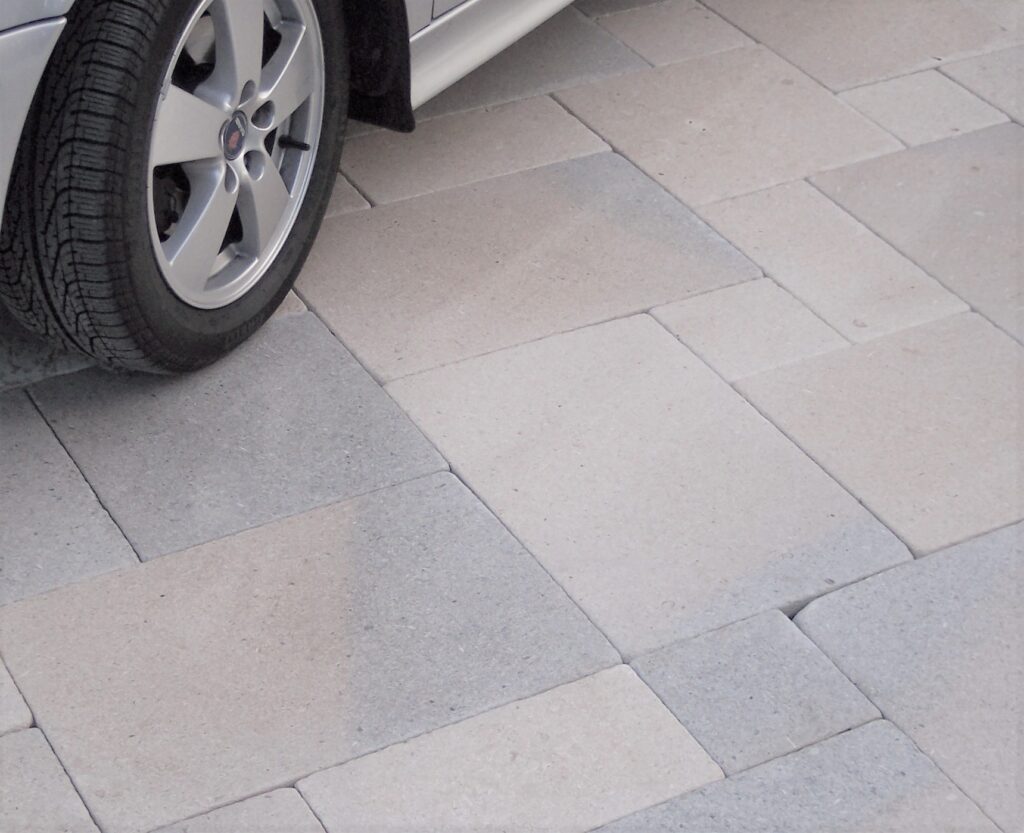
Though we often think of concrete driveway systems, paved natural stone driveways have been around just as long and longer! Natural stone driveway pavers provide the necessary flexural strength and an artistic element. Driveway pavers can be a unique and functional feature enhancing the overall property, rather than presenting simply as a flat beige or black surface, best ignored.
These days, a shift to large-format natural stone pavers for both residential and commercial driveway systems is gaining popularity and replacing that concrete surface. Natural stone driveway pavers in all formats–large and traditional (small 4”x4”, 6”x6” cubes)–with their aesthetic and structural benefits make them a strong alternative to concrete pavers. Interested in learning more? Considerations for Specifying Natural Stone in Driveway Paving Applications.
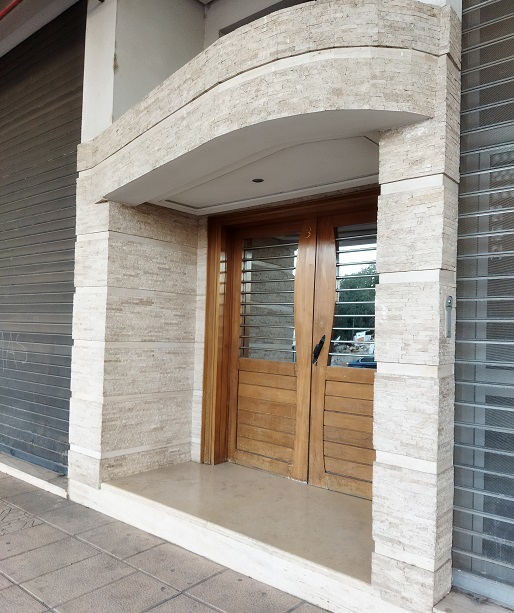
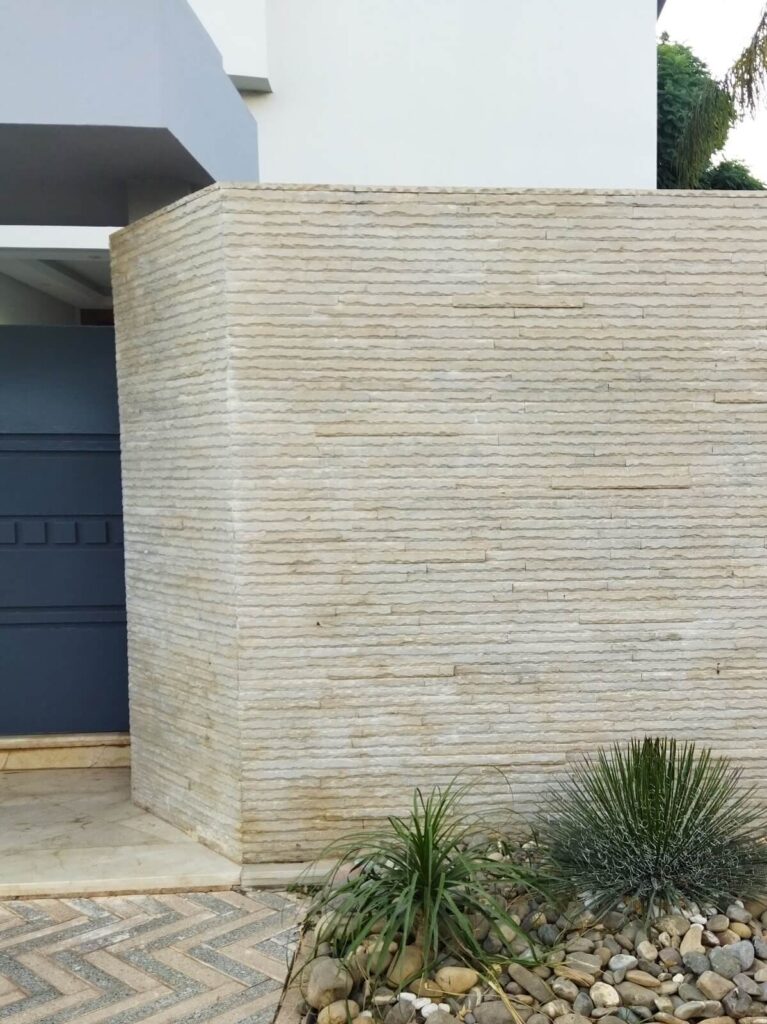
Design with Natural Stone Veneer and Cladding
Natural stone veneer and cladding provide an excellent architectural tool for interior as well as exterior walls. Natural stone has always been a much-loved building material because of its strength, durability, great look and minimal maintenance cost. However, constructing a stone building is certainly not cost-effective. This is where the value of natural stone cladding or veneer comes in. It provides the functionality, advantages and look of stone, and at the same time is cost-effective and easy to install.
Before you go for that faux stone panel, remember that they are likely to fade and get chipped over time whereas veneer in natural stone will look great for generations to come! With a textural change in the stone for veneer and/or cladding, such as split face, hand-chisel, or bush hammer, you can add the distinction of an accent look without changing the color of the stone used in the project. When building a wall out of solid block stone, the face finish options are hand chisel and split face. Veneers and cladding product sizes range from 6” x free length and up to 20” x 40” (with bush hammer on back for stickier installation).
Cream Travertine mini split face veneer – claddingSeahaze Sand Limestone small chipped wall veneerSEAHAZE SEA Limestone jumbo wall cladding
A perfect, “save the day” application would be an old, ugly concrete patio, which is degraded somewhat, some cracking here and there but basically in decent shape. You can make it new again by laying a paver pedestal system over the concrete and placing your pavers or tiles on top. With a crew of three or four good laborers, you could probably install several thousand square feet in one day. A pedestal paver system works well (and very cost-effectively) if you use large format tile or paver sizes such as 12”x12”, 16”x16” or up to and, including 24”x24”.
Caution: you must use the correct material/product because it must be strong (appropriate flexural strength). Otherwise, the corners may break since there is no support in the center of the paver or tile. Read PEDESTAL SYSTEMS EXPAND THEIR FOOTPRINT IN BOTH INTERIOR AND EXTERIOR PROJECTS to learn further stone implementation information about paver pedestal systems.
Paver pedestal system materials are 3cm (1 1/4″) thick, (exceptions noted below):
Marbles (for the most part), up to 24×24
SEAHAZE SEA limestone, up to 24×24 or 30×30
SEAHAZE SAND limestone, up to 24×24 or 30×30
Can use up to 18x18x2cm (3/4″) limestone, travertine, or marble
Cross cut travertine (not vein cut) travertine up to 24 x 24
NATURAL STONE DISCLAIMER: Buyer acknowledges that stone is a natural substance, formed within the earth and that distinct types of stone, as well as individual stones within any given type, may vary in texture, color, thickness, density, durability, or fitness for a particular use or purpose. Natural stone may chip, peel, flake, bleed, stain, oxidize, or otherwise deteriorate over time. These attributes should be considered when using stone, especially in any exterior application subject to moisture. Buyer acknowledges that Seller has no control over Buyer’s selection or use of any stone and that exposure to weather, installation techniques, or preservative measures used by Buyer.
Buyer’s purchase of stone from Seller constitutes Buyer’s acknowledgment of the above, and acceptance of the risks inherent in the use and installation of natural stone and a waiver of all claims which Buyer may have against Seller arising from the chipping, etching, flaking, staining, bleeding, oxidation, or other deteriorations and/or defects inherent in natural stone.
Yes, even for residential pool decks or patio pavers!
Largely unrecognized throughout the construction industry in paver installation is the need for stabilization grids. These grids are also called cellular confinement systems (CCS), load support grids, or geocells. I would say that the large-scale industrial masonry world understands because they have heavy-duty architects working on road projects, those that require forethought, and longevity. On small to mid-size projects ie: parking lots to driveways, backyard patios, or pool deck paver projects, it typically is not a consideration to use stabilization grids.
Stabilization equals Longevity of Paver Installations
Stabilization is at the heart of the project when it comes down to the longevity of the installation. Anybody can lay down some stone or pavers on soil or grass and they’ll stay there for a week, a month, or a year. If you want pavers to stay in place for 10, 20, or 50 years, you need to have a stable substrate. As with interior tile projects and exterior paver projects, it’s all about the substrate. Without the proper substrate, nothing else matters because you will have failure – 100% guaranteed.
Courtesy CellTek
Recommended Use of Stabilization Grids
So, without the soil stabilization under a paver installation, you’re extremely likely, in almost every scenario, to have some movement. There are some very stable environmental situations that may not necessitate it. Climates that don’t have much temperature change, climates that don’t have a lot of rain, and have very compact sandy soil, are where you will not get a lot of movement underneath. As you know, that is a small portion of the world we live in that has that kind of climate.
So, conversely, if you have a lot of rain, if you have a lot of temperature change, particularly if you have a lot of cycling in freeze/thaw, and that’s the real killer, you’re going to have movement in your substrate. When you have movement in your substrate, you are going to have movement above your substrate because the substrate is what is holding your stone or pavers. For that reason, stabilization grids are recommended.
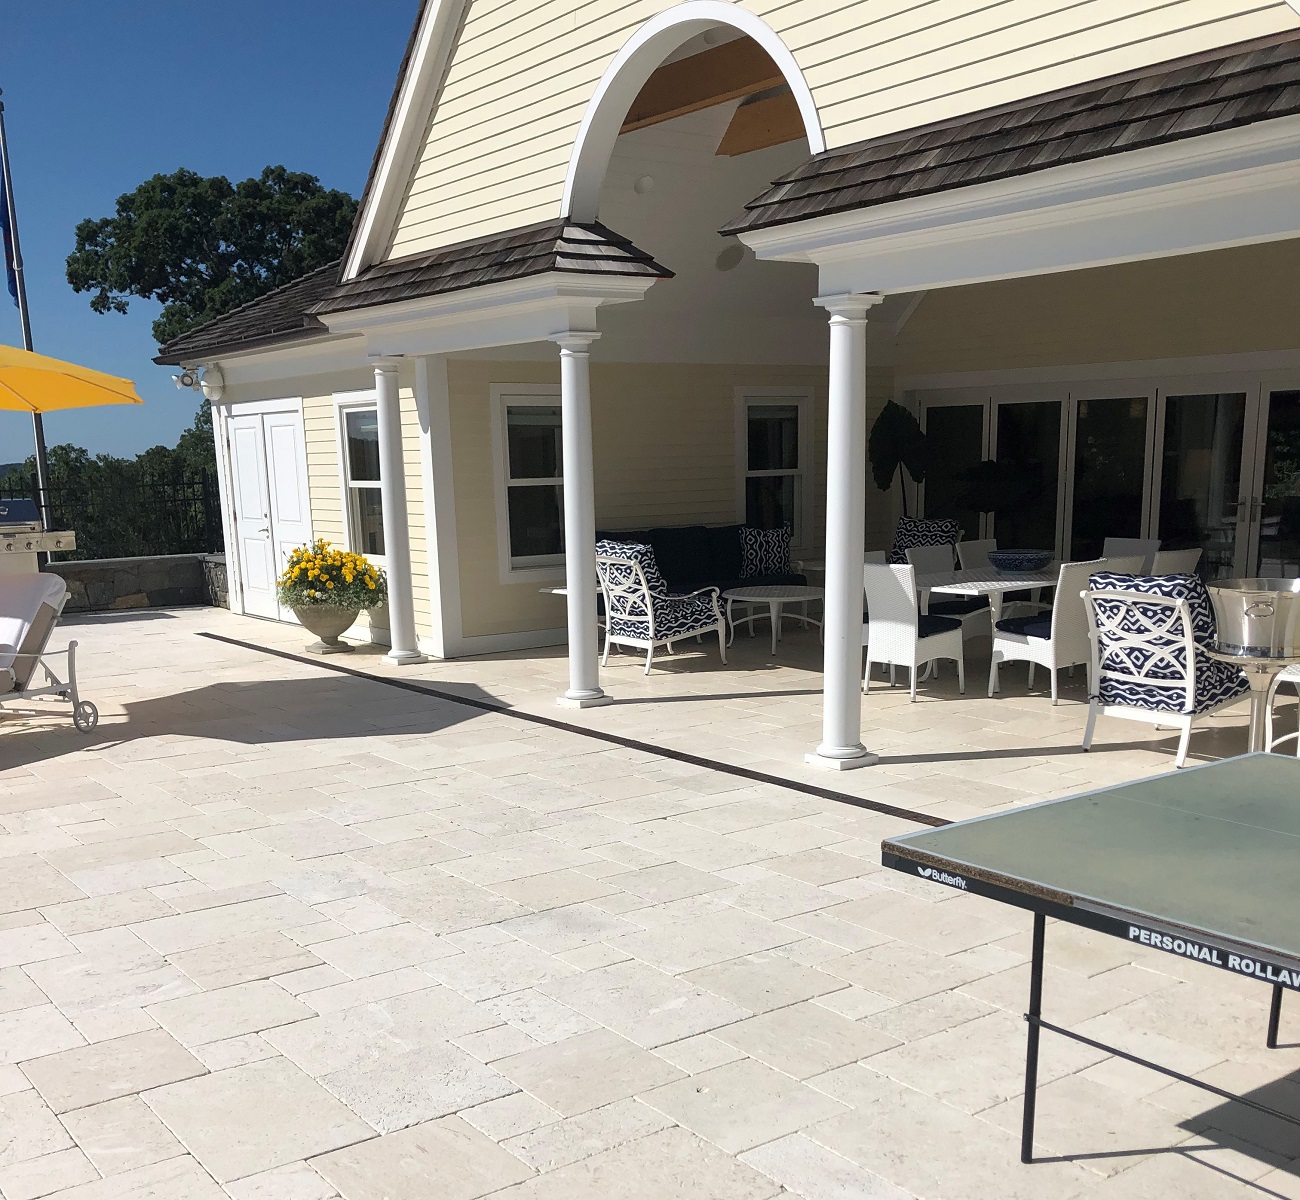
Travertine pavers with CCS in residential patio and walkway project. Concrete pavers and CCS for driveway project.
Paver Installation on Concrete Slab with Stabilization Grids
When you have a concrete slab, it’s the adage, it’s not IF your slab will crack or fail, it’s WHEN. Concrete slabs are extremely prone to failure because they are asked to perform very unforgiving and next-to-impossible tasks…to endure movement underneath them without cracking or failing. And, again, when you have movement underneath, you’re going to have the material on top crack and fail. Even the concrete itself is prone to failure without movement from underneath because of heat, especially in hot climates, and or cold or thermally cycling climates, where it gets cold then hot, cold then hot. The slabs will expand and contract according to the heat and cold they are exposed to and particularly, the cycling of heat & cold, heat & cold.
Small concrete slabs, for sidewalk sections 3’x3’ or 4’x4’ are not a big concern. Unfortunately, enough people do not put on expansion joints, they use control joints, which when it fails, fail along the control joint. A control joint is nothing more than a little line cut into the surface of the concrete making it a little bit weaker on that line so if it cracks, the crack goes along that line that was cut into it. So, it’s a prettier failure. The concrete slab is not the best solution.
If there are no elevation problems or choose to raise your elevation, it’s perfect to put a grid down on top of the existing concrete slab and put pavers on top of that.
Benefits of using STABILIZATION GRIDS
When there is failure such as washing out from too much rain underneath, and without a properly compacted substrate, you can have the substrate washing out. This happens from normal flooding, heavy floods, and the constant flow of water eventually eroding the substrate and gravel. A stabilization grid (or cellular confinement system) will hold the substrate in place so that it’s not possible to wash out. The gravel can’t travel through the walls of the grid, so it holds it all together and in place.
Use stabilization grids to combat the freeze-thaw danger
One of the bigger dangers is the freeze/thaw expansion and contraction issue that is extremely common in the climates of the upper forty-eight states in America and around the world. When you have snow and wintry weather, warm weather, then freezing weather, warm weather, and moisture-cycling, the moisture gets underneath the pavers and freezes. And, as we all know, when you look at ice cubes in your freezer, they all have a hump in them because when water freezes, it expands. So, you’re going to get the substrate holding water. If there is quick freezing overnight, the water will expand and therefore, your whole installation will heave up a little bit.
When it heaves down, when you use the grids, the grids will hold it in place instead of it shifting a little bit every time. When it shifts a little bit every time, from heaving then relaxing, heaving then relaxing, heaving then relaxing, you can imagine things will start to spread out over many cycles and next thing you know your pavers are 1/8” apart then ¼” apart, next thing you know, they have those openings and more water attacking it and now you have bigger gaps for the water to go in and turn to ice and more washout issues, etc. The whole thing kind of goes to hell without the use of a stabilization grid or cellular confinement system.
Are you looking for different exterior stone options? Gothicstone is here to help. Contact us today to find out more about our products so we can value-engineer your stone solution. We look forward to providing you with natural stone materials to help make your client’s outdoor area an exclusive living space.
Stone Cleaning and Sealing Tips for Natural Stone Pavers, Tile, Coping, and Step Treads.
Hardwood decks/patios, as well as wood on houses/buildings, need to be power washed, cleaned, and sealed on a regular basis. Although you power wash and seal a hardwood deck every year, natural stone deck maintenance is much less frequent. Stone sealer and cleaner products are very high-tech and require minimal maintenance.
Stone Cleaner Maintenance for Natural Stone Pavers, Tile, Coping or Treads:
Regular, basic maintenance type cleaning: *
Use a stone cleaner that is easy to find at any hardware store or
Use any non-caustic degreasing agent (mild dish or hand soap) mixed in warm water.
Deep cleaning, minor restoration (mild etch) type cleaning:
Dilute muriatic acid in ten-part water to 1-part store-bought muriatic acid.
Wet the entire stone surface.
Pour dilute mix and move it around with a sponge mop – consider doing it in twenty square feet overlapping sections. Don’t let it sit in one place without moving and agitating it. The acid will neutralize after 10-15 seconds.
Finish by rinsing the surface with clean water.
Note: The acid should not be strong enough to do any damage to the ecology or be harmful to your flower beds next to the stone patio. Once the acid contacts the stone, there is a little bit of sizzle, a bit of chemical reaction that happens and then it should be neutralized.
Stone Sealer Maintenance for Natural Stone Pavers, Tile, Coping or Treads: **
With natural stone, you should never use a prophylactic coating type of sealer because the stone wants to breathe. Using a “breathable” stone sealer tends to last many years longer. When using a high-quality sealer, you will only have to seal every 5-15 years or longer. Some companies offer both a color-enhancing stone sealer and a “matte” finish stone sealer. Both types of sealers are impregnating sealers and penetrate the stone about a ¼”. The color-enhancing stone sealer will help the stone “pop” its deep rich darker color (like when it is wet but doesn’t add shine or sheen to the stone). The “matte” finish stone sealer leaves the stone the same color when it is dry. Gothicstone recommends Stain Proof, stone cleaner, and stone sealer products.
Considerations when applying stone sealer:
If grout was newly applied to the tile, pavers, coping, or treads, you should wait at least 2 weeks for the outgassing to complete before using a stone sealer.
If only stone cleaning was done, seal after the stone is thoroughly dry, typically a day or two.
Follow the directions on the bottle for the impregnating sealer.
* This does not apply to highly polished marble – contact us for those details.
** We highly recommend purchasing sealer products from a tile showroom. We recommend Stain Proof by Dry-Treat.
Are you looking for different exterior stone options? Gothicstone is here to help. Contact us today to find out more about our products so we can value-engineer your stone solution. We look forward to providing you with natural stone materials to help make your client’s outdoor living space unique.